Workflow Editor
This guide provides a top-level overview of the Workflow Editor, introducing its role in the App Building Environment and its key features.
What is the Workflow Editor?
The Workflow Editor is part of the LiveCode Create App Building Environment that enables you to define the logic of your app visually. Instead of writing code, you use Action Blocks to create workflows, which control how your app responds to user actions or system events.
With the Workflow Editor, you can:
- Trigger actions when users interact with widgets (e.g., button clicks or text input).
- Perform tasks like updating data, showing messages, or navigating between layouts.
- Organize app logic into clear, visual workflows for easy management.
Accessing the Workflow Editor
To open the Workflow Editor:
- Right click on a layout, container, or widget in the Canvas Area to open its context menu.
- Click the Edit Actions option.
- Click on New Workflow to begin editing a workflow.
- Select a name for the workflow and an event that will start it.
Key Features of the Workflow Editor
The Workflow Editor is designed to make building logic straightforward and intuitive. Here’s a quick overview of its main components:
1. Triggers
A Trigger determines when the workflow runs. Common triggers include:
- User Actions: Such as a button click, text input, or list item selection.
- System Events: Like app load or data changes.
Triggers are predefined based on the messages sent by compatible widgets and cannot be renamed.
2. Workflow Canvas
The Workflow Canvas is the visual workspace where you design workflows.
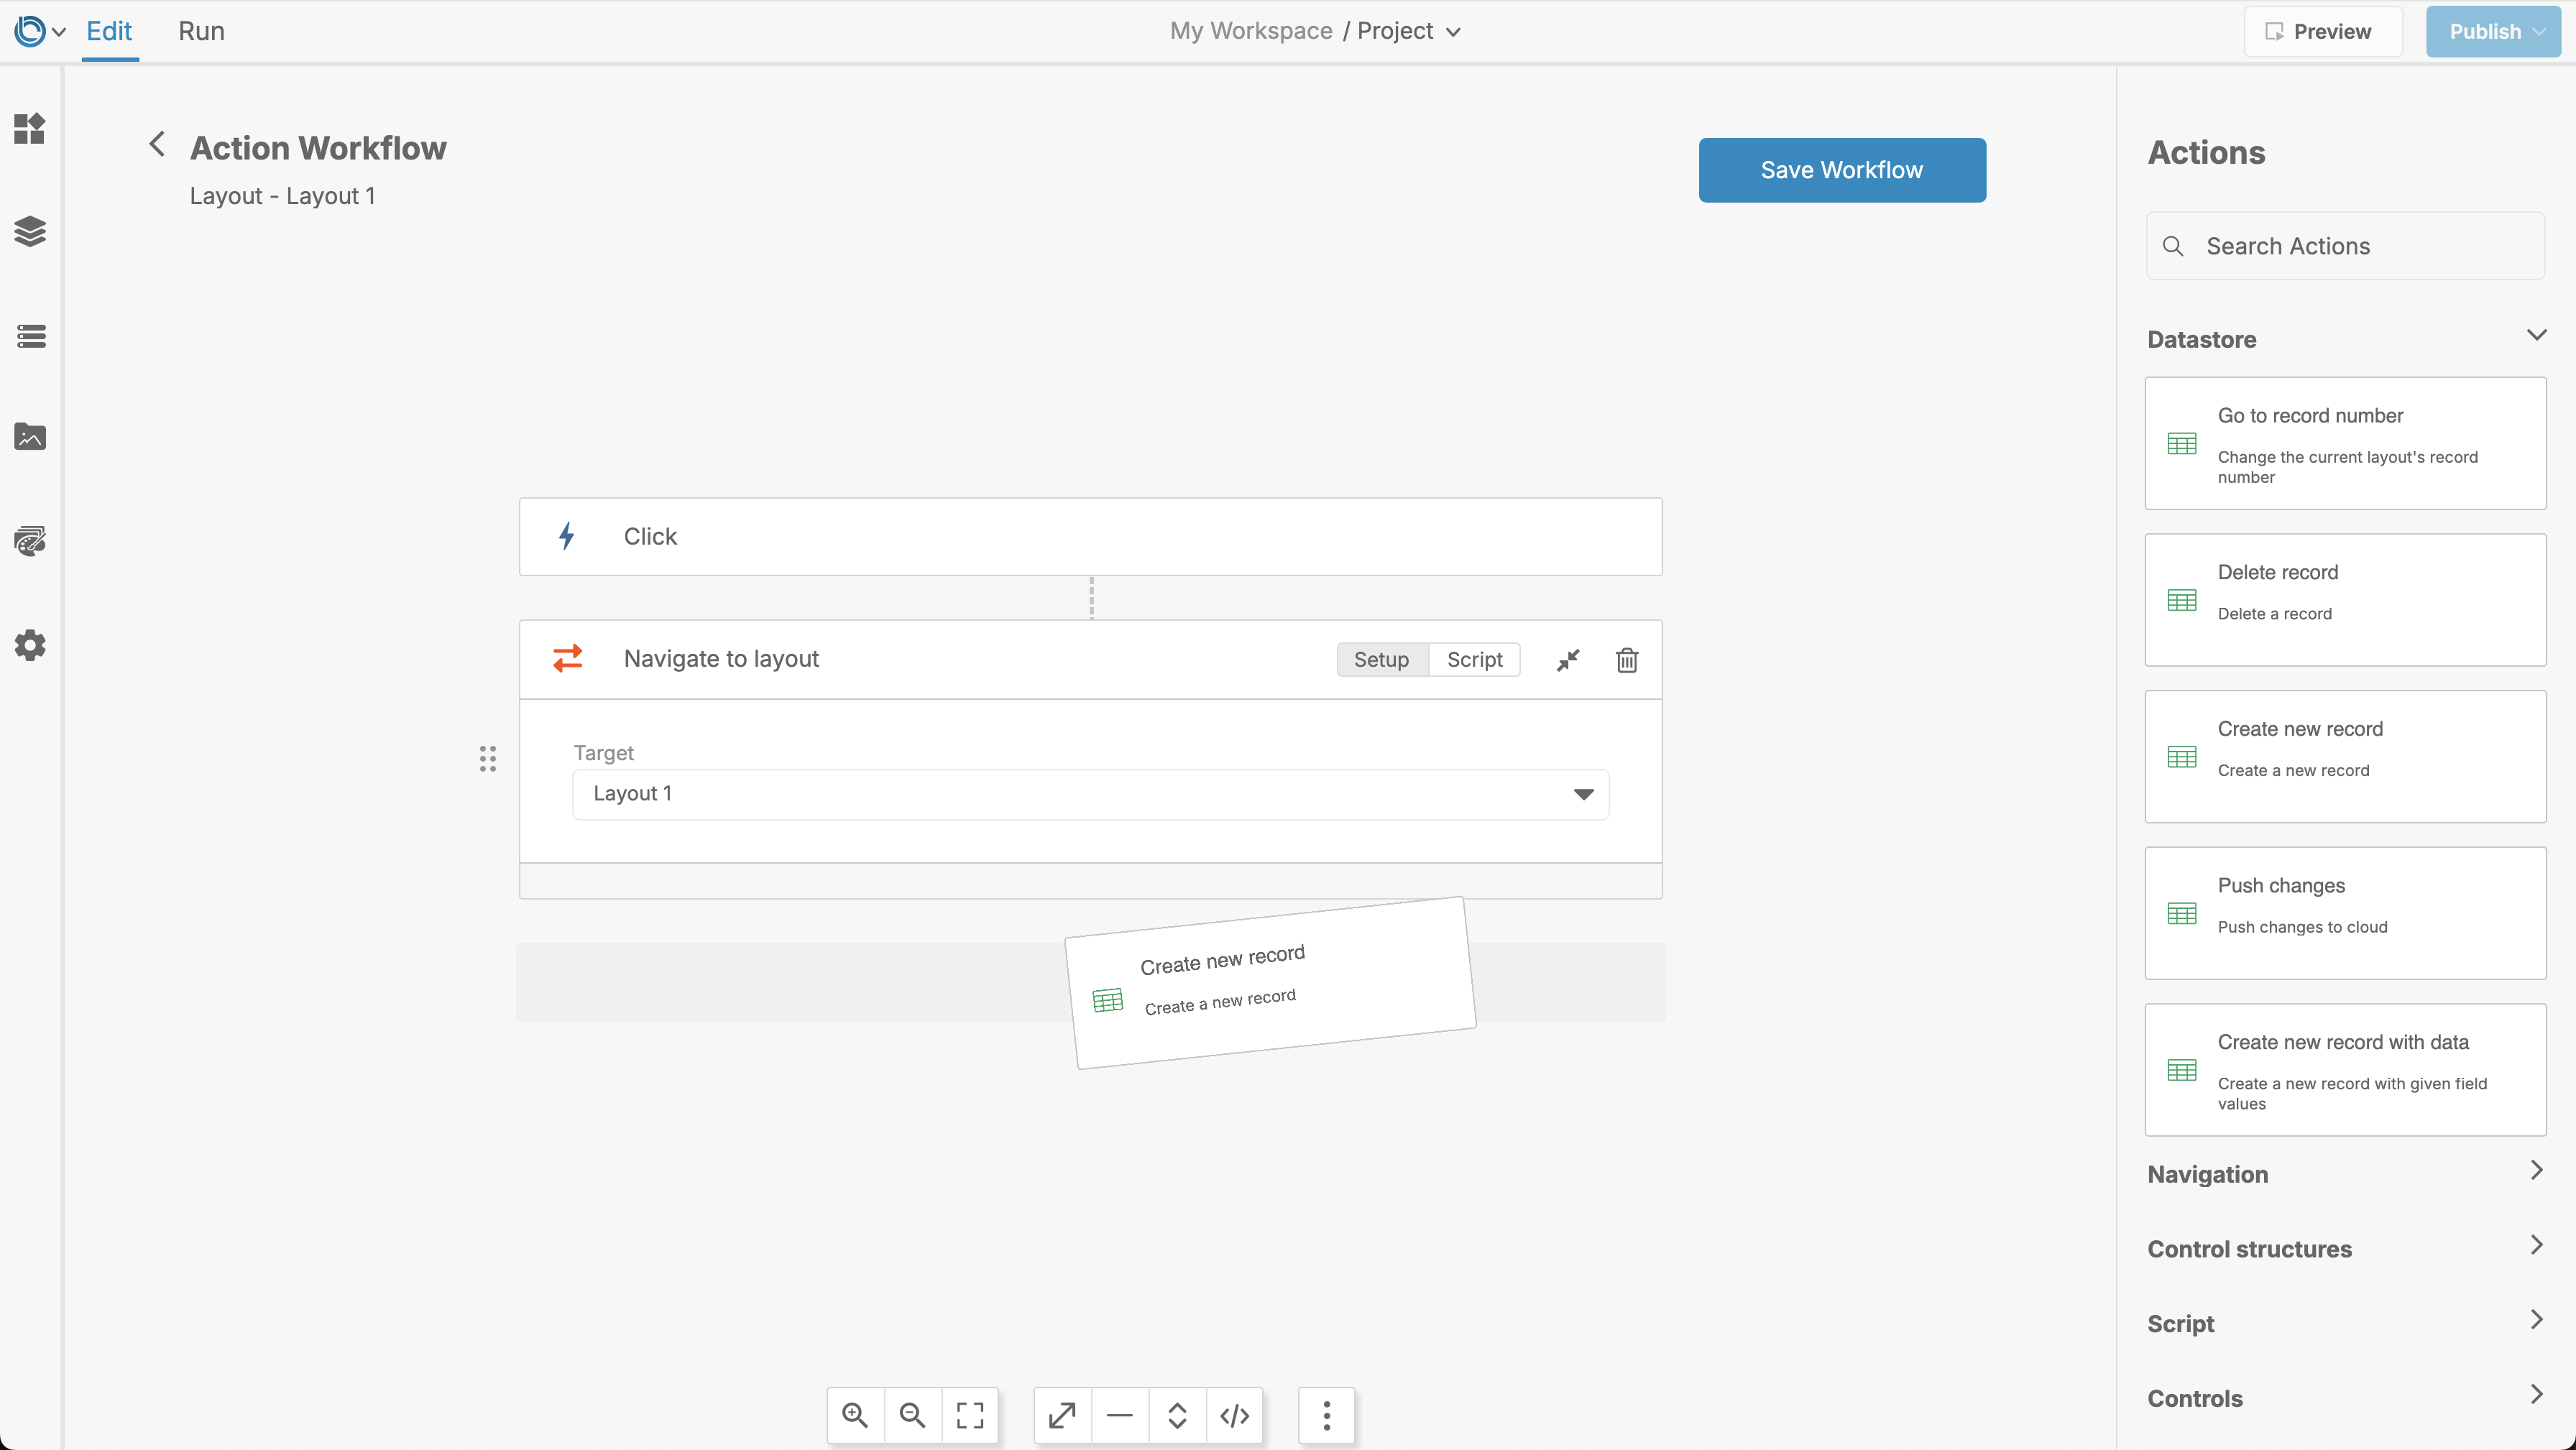
- Add Blocks: Drag and drop Action Blocks onto the canvas.
- Move and Organize: Rearrange blocks for clarity.
- Connect Blocks: Create logical connections between actions.

3. Connecting Action Blocks
In the Workflow Editor, you connect Action Blocks visually to define the sequence of actions. Drag and drop connections between blocks to set the order in which tasks are performed.
- Start Point: Every workflow begins with a trigger.
- Action Flow: Action Blocks are connected in a logical sequence.
- End Point: The workflow finishes when all connected actions are completed.
4. Action Blocks
Action Blocks are the building blocks of workflows. Each block represents a specific task or action, such as:
- Show or Hide Widgets
- Navigate to Another Layout
- Create or Update Data Records
- Show Alerts or Messages
Example Workflow
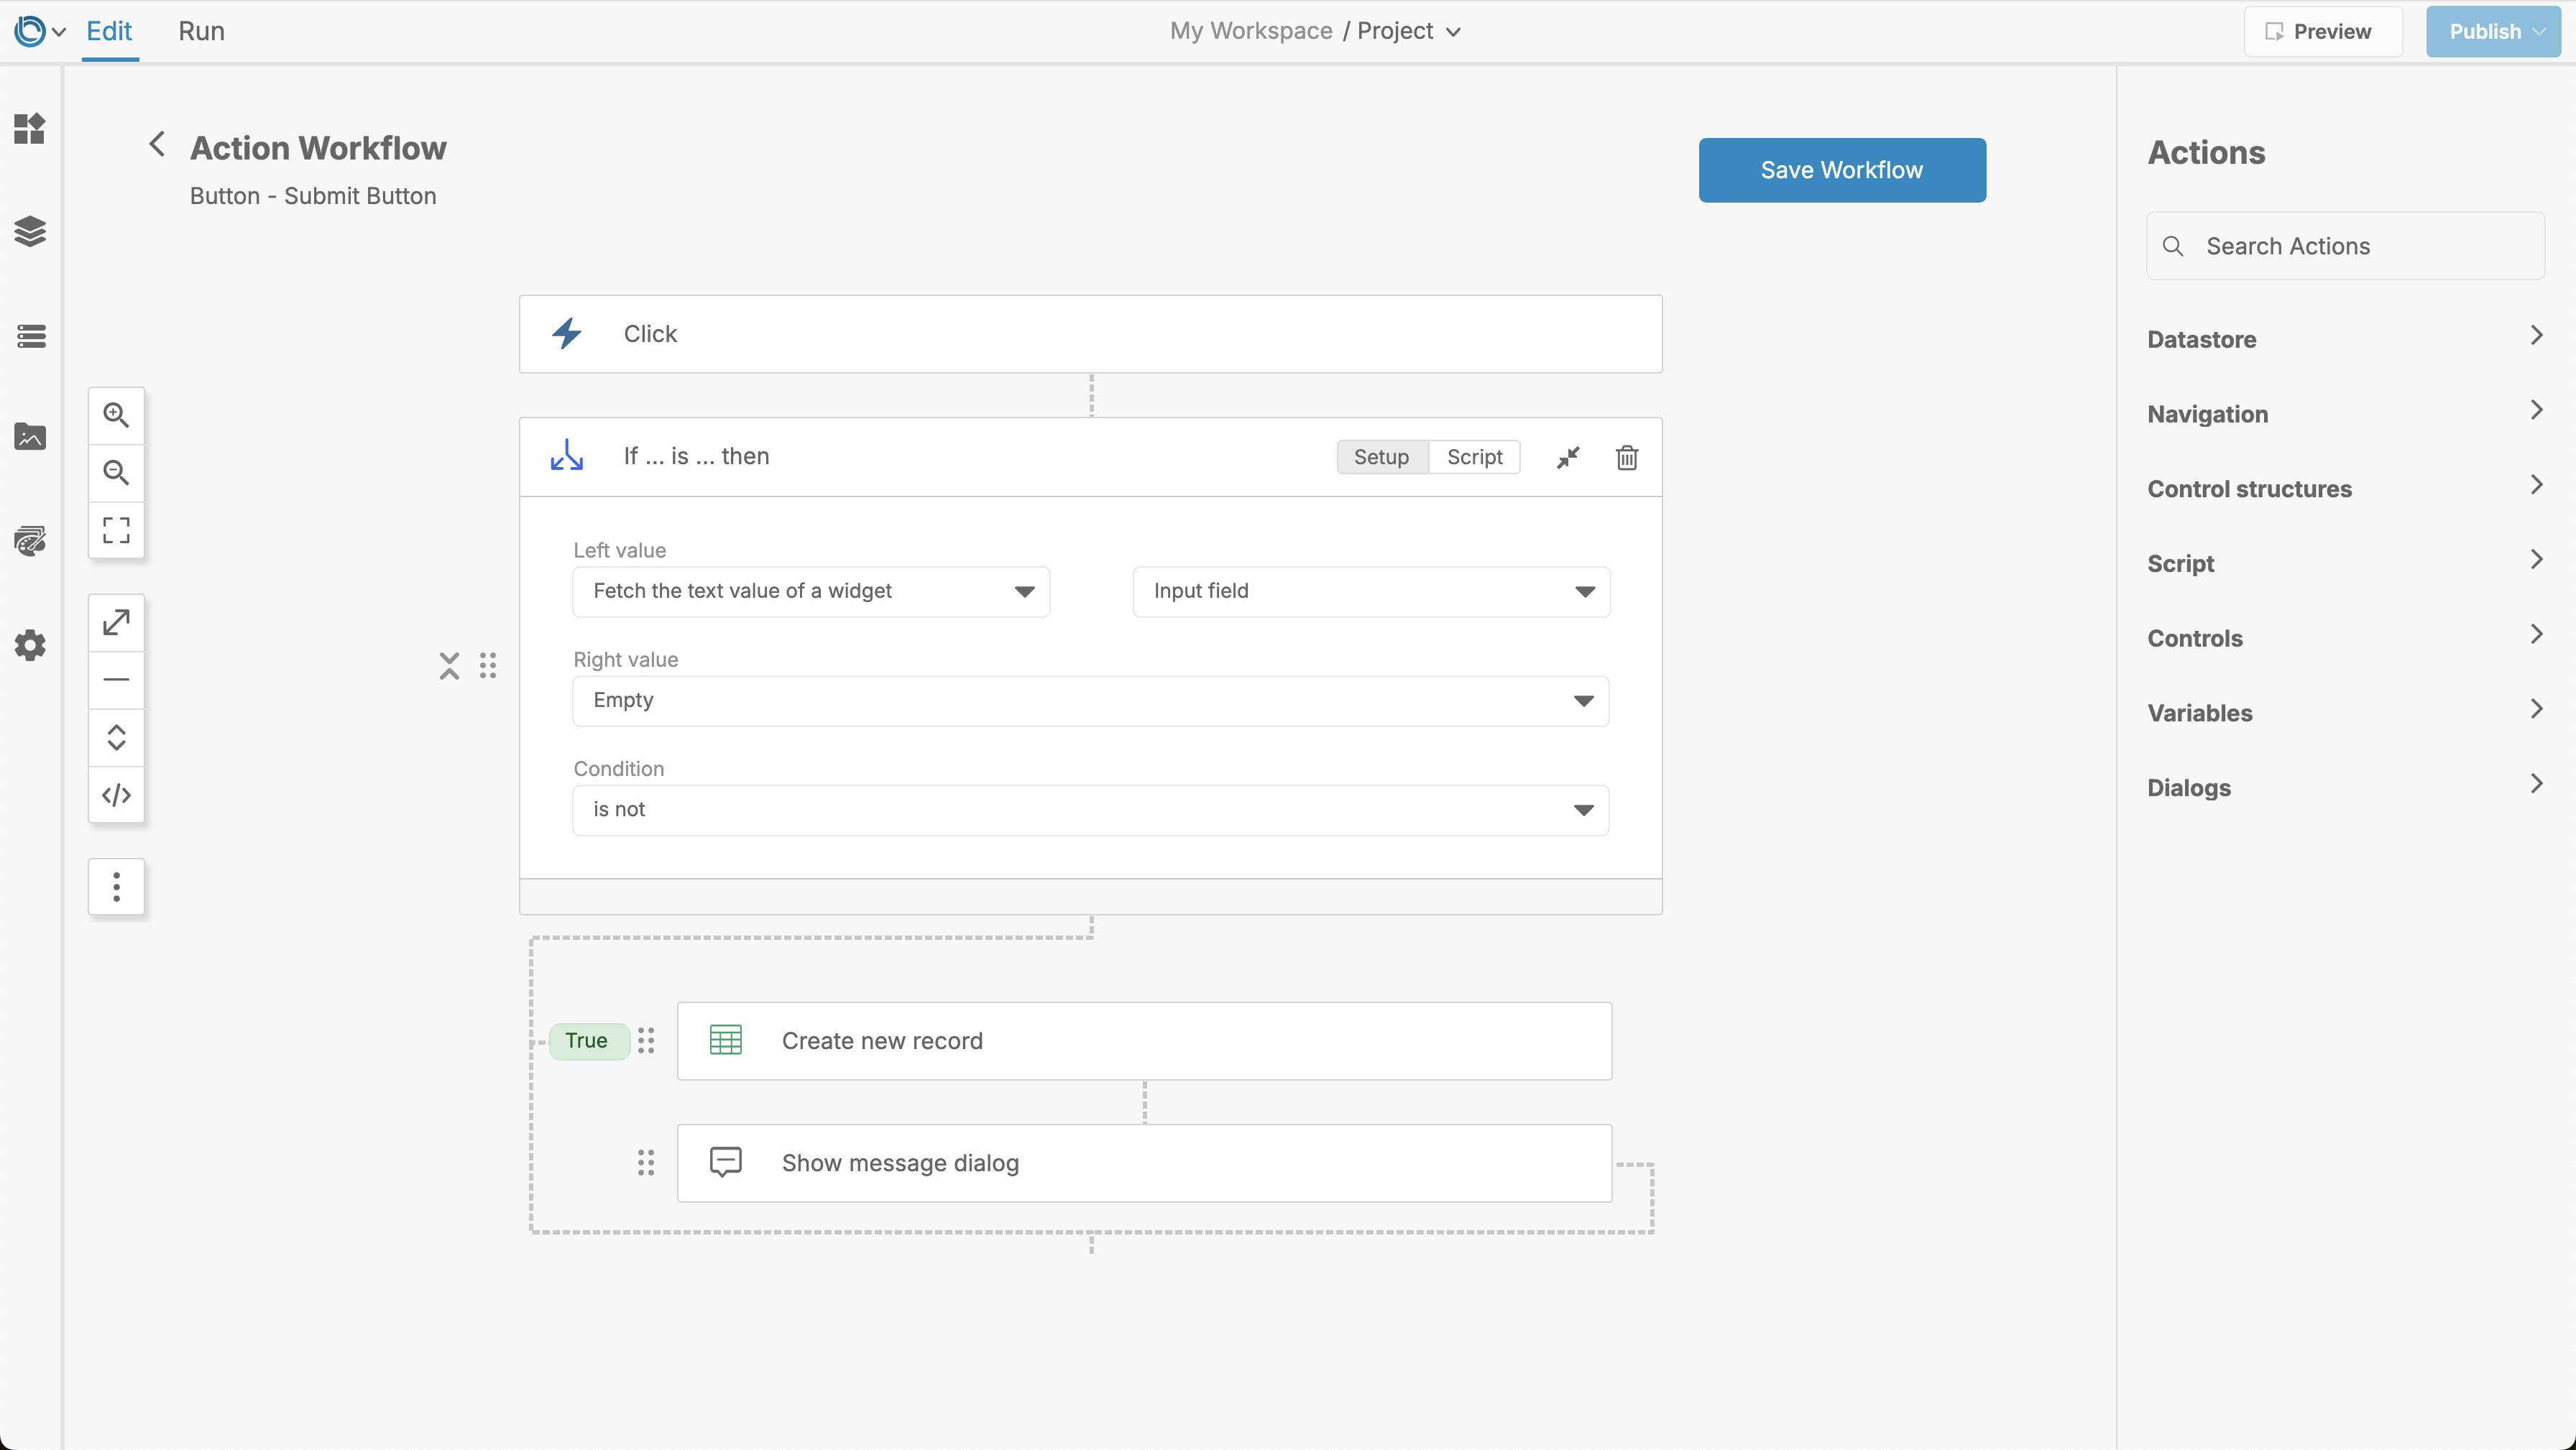
Here's an example workflow for a Submit Button:
- Trigger: User clicks the Submit Button.
- Action 1: Validate the text in an Input Field.
- Action 2: Add a new record to a Collection.
- Action 3: Show a confirmation message ("Task Added Successfully").

Tips for Using the Workflow Editor
- Start Small: Begin with simple workflows and add complexity as needed.
- Organize Blocks: Keep workflows clean by aligning and grouping related actions.
- Test Often: Use Run Mode to test workflows and ensure they behave as expected.
For further learning: